3. Setting Up Postflows
This guide walks you through the full Postflows onboarding wizard - from connecting your Shopify store to enabling your first shipping notifications.
Before you start
Make sure you have:
A Shopify store with admin access
A Postflows account (see Creating your account)
Overview
The onboarding wizard takes you through these steps:
Connect your Shopify store
Select your plan
Connect your email platform (Klaviyo or Omnisend)
Configure your events
Set up your tracking page (optional)
Note: Ecomflow clients are automatically assigned the Beta plan at step 2 and do not need to manually select a plan.
Step 1 - Connect your Shopify store
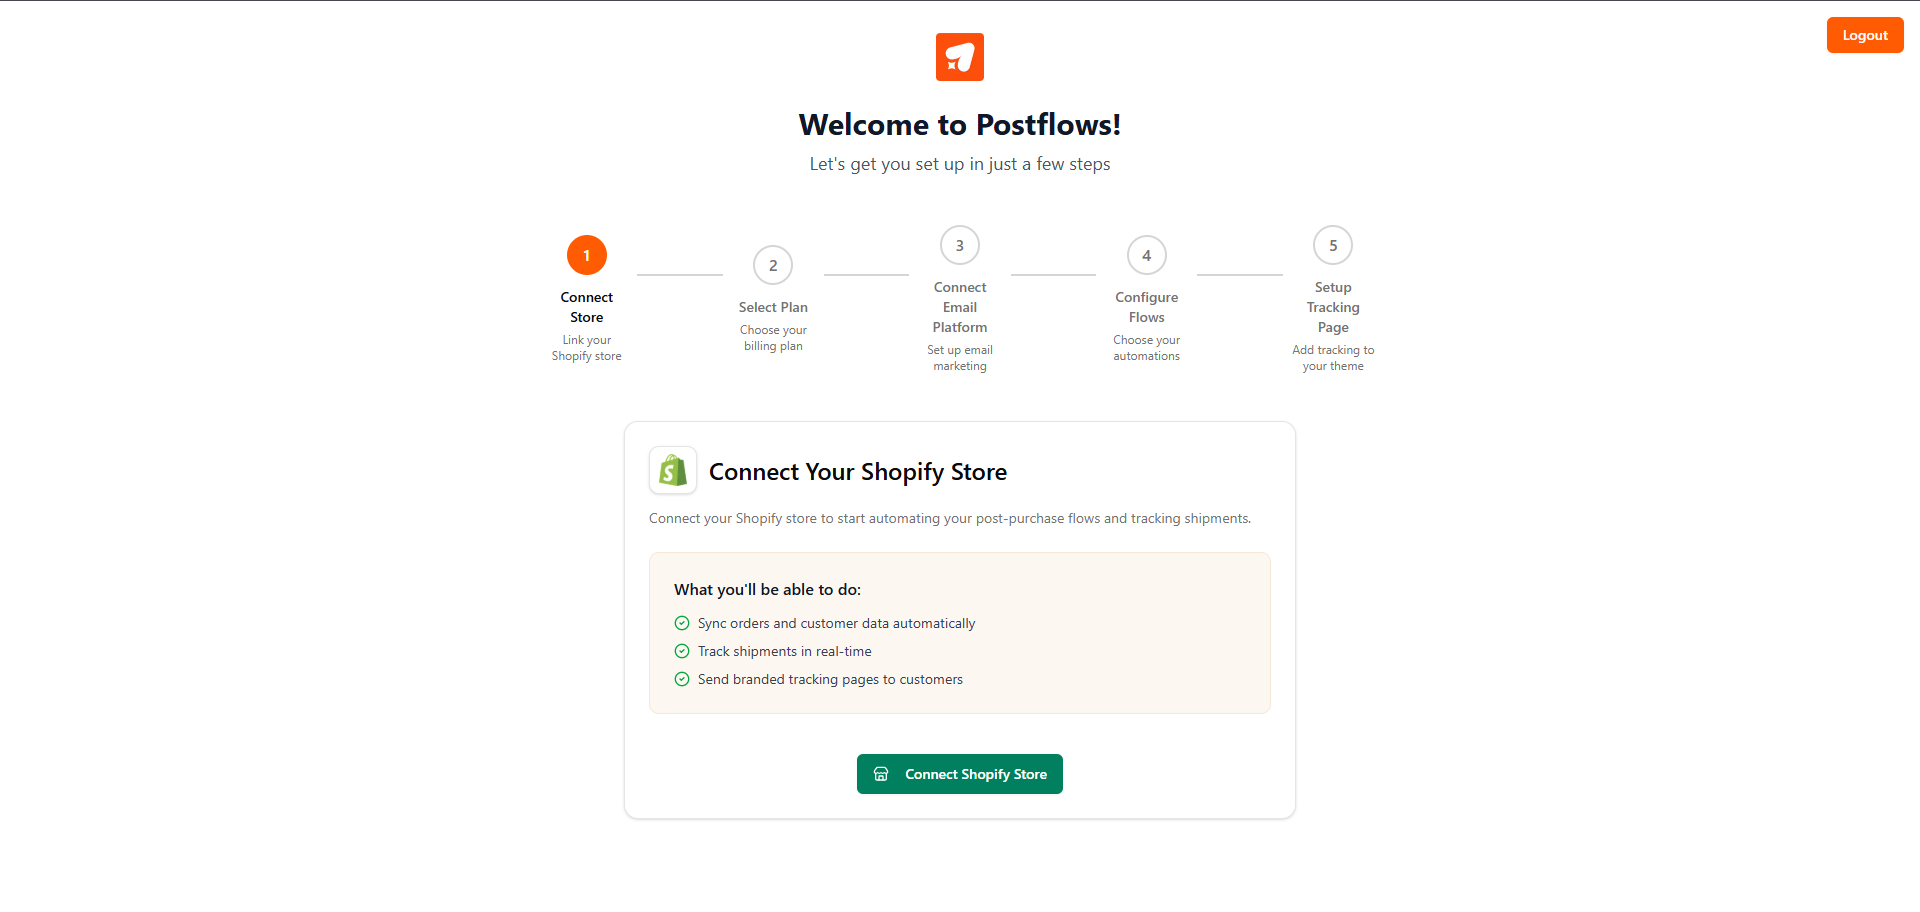
After logging in, the onboarding wizard opens automatically.
Click Connect Shopify store
A modal will open - click Connect with Shopify
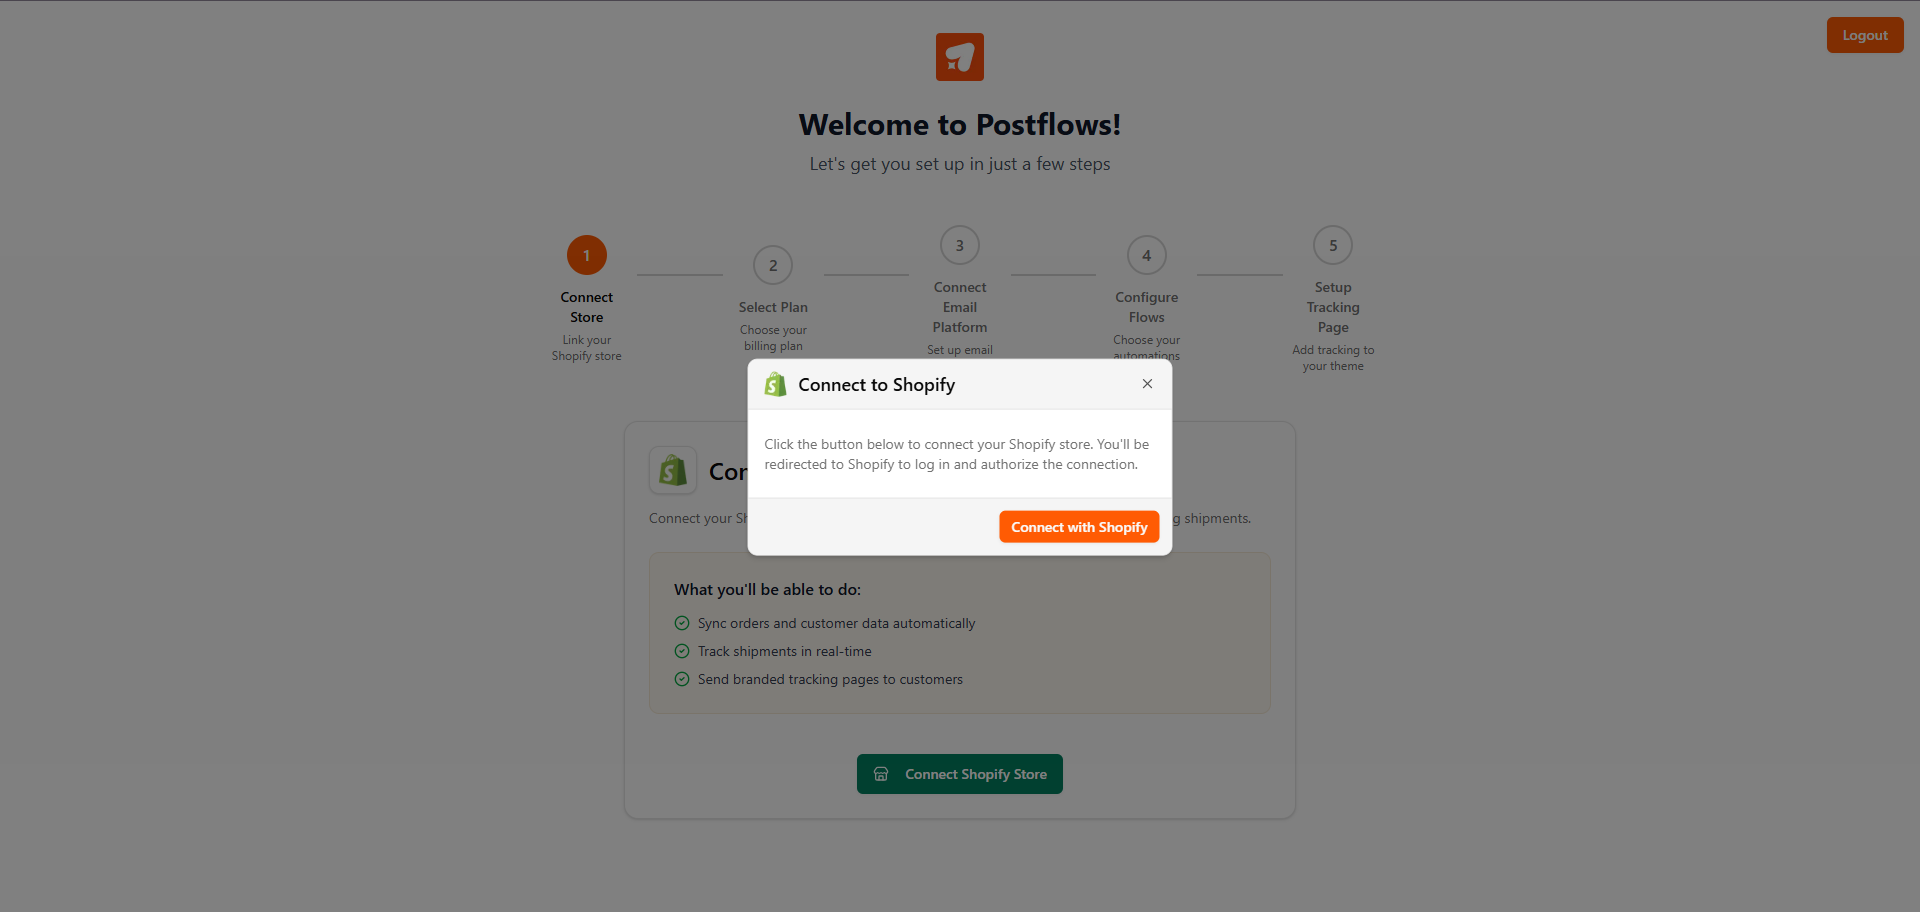
You'll be redirected to Shopify to authorize the app
Review the permissions Postflows is requesting, then click Install app
Shopify redirects you back to the Postflows onboarding wizard automatically
Your store is now connected. Postflows registers the necessary webhooks in the background to receive order and fulfillment updates from Shopify in real time - no manual configuration needed.
Step 2 - Select your plan
Choose the plan that fits your store's needs. See Plans and Pricing for a full comparison.
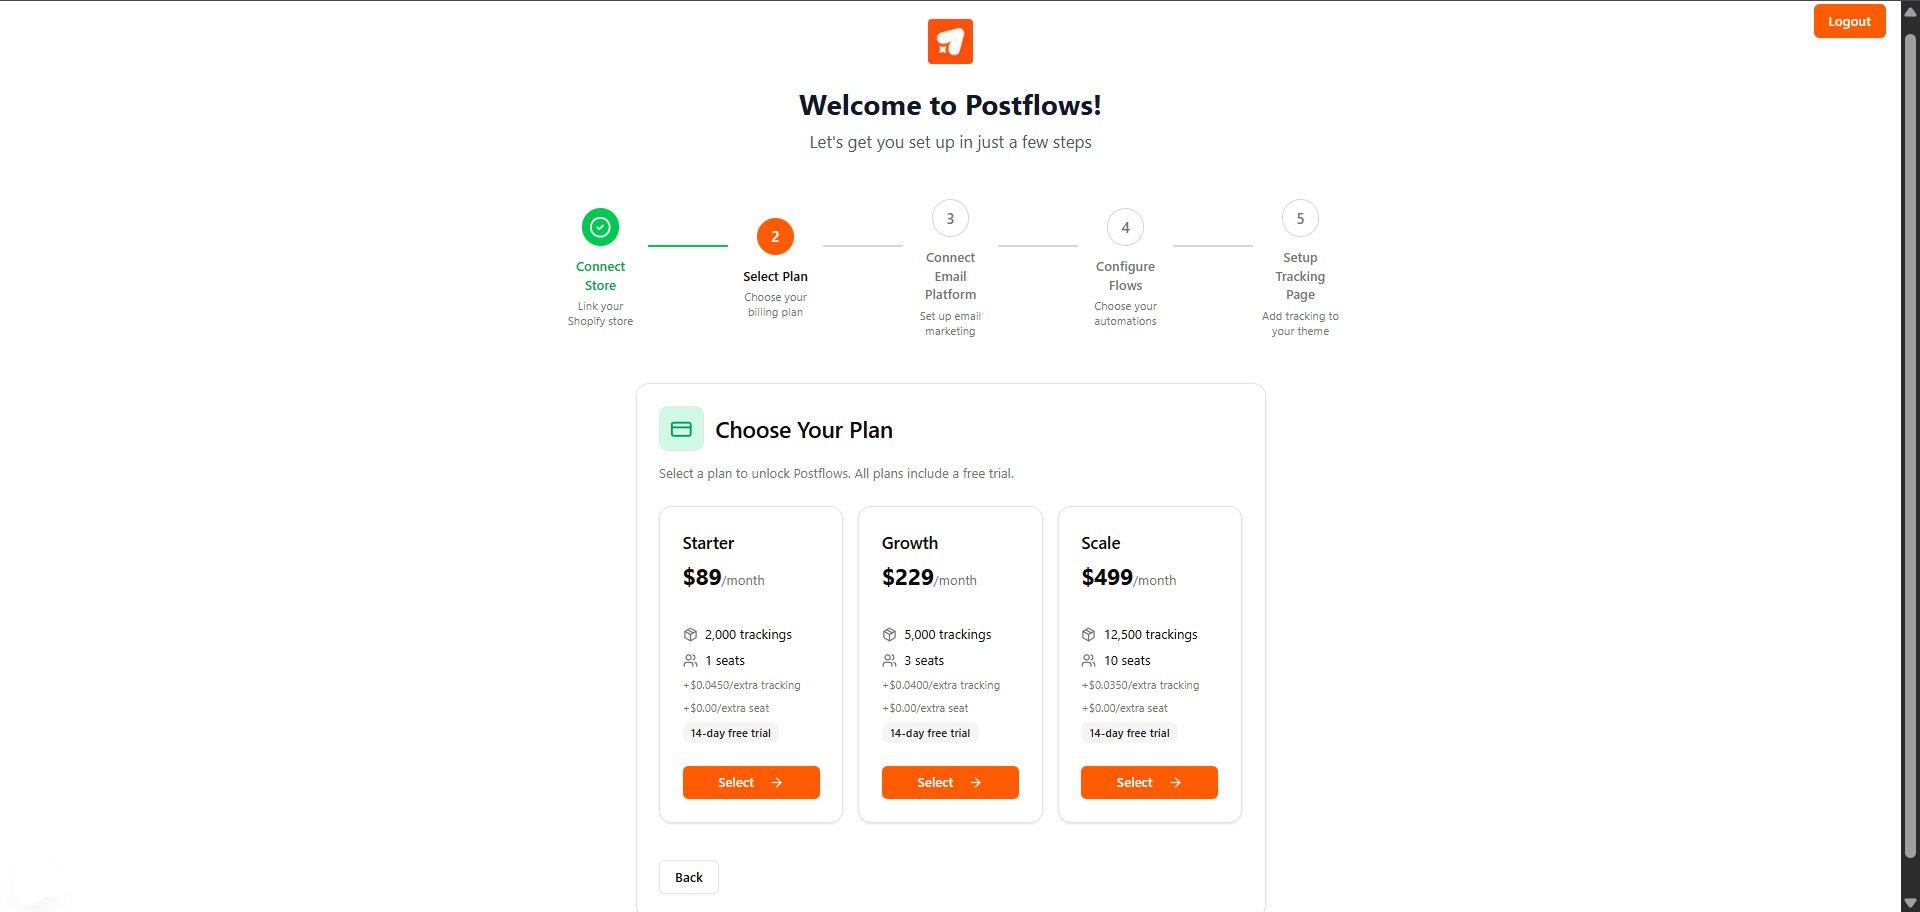
Note: If you're an Ecomflow client, you'll be automatically placed on the Beta plan and this step will be skipped.
Step 3 - Connect your email platform
Postflows forwards shipping events to your email platform, which then sends the notification emails to your customers. Connect at least one integration to continue.
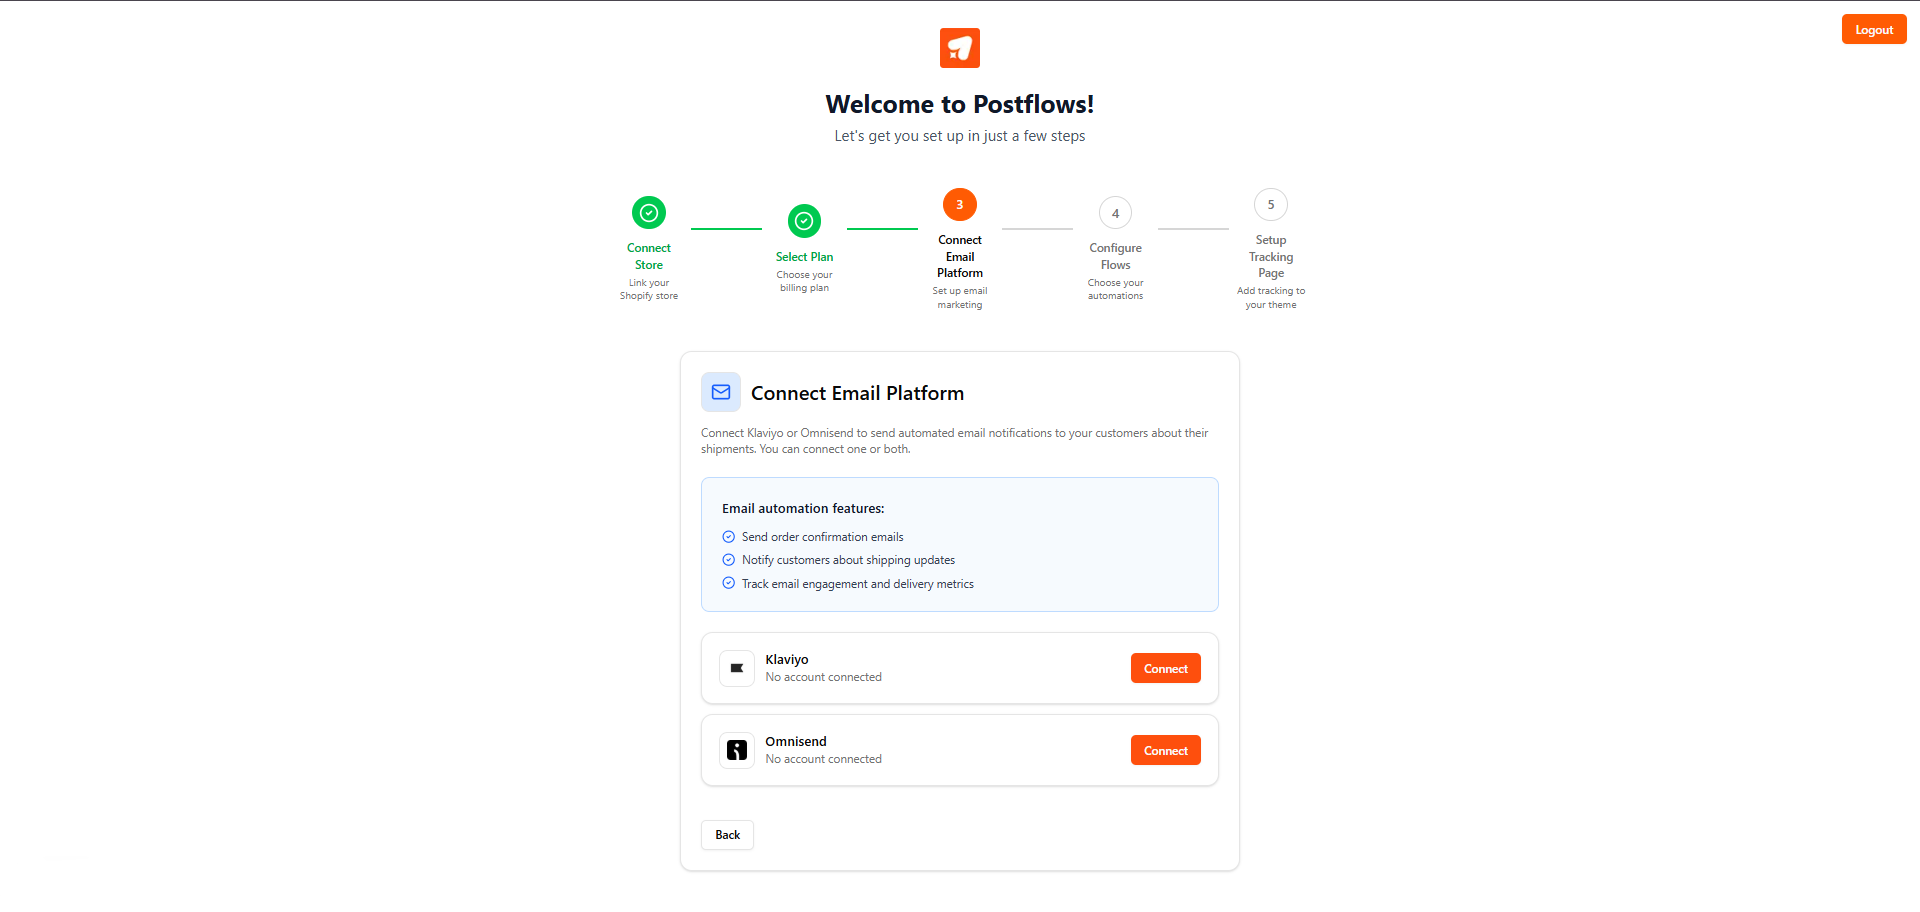
Connecting Klaviyo
Click Connect Klaviyo
You'll be redirected to Klaviyo to authorize the connection
Click Allow access
You're redirected back to Postflows with Klaviyo connected
Connecting Omnisend
Click Connect Omnisend
You'll be redirected to Omnisend to authorize the connection
Click Allow access
You're redirected back to Postflows with Omnisend connected
Note: You can connect both platforms if you use both, but you only need one to get started.
Step 4 - Enable your first events
Postflows has 8 shipping events that can trigger notifications. Toggle on the ones you want to activate.
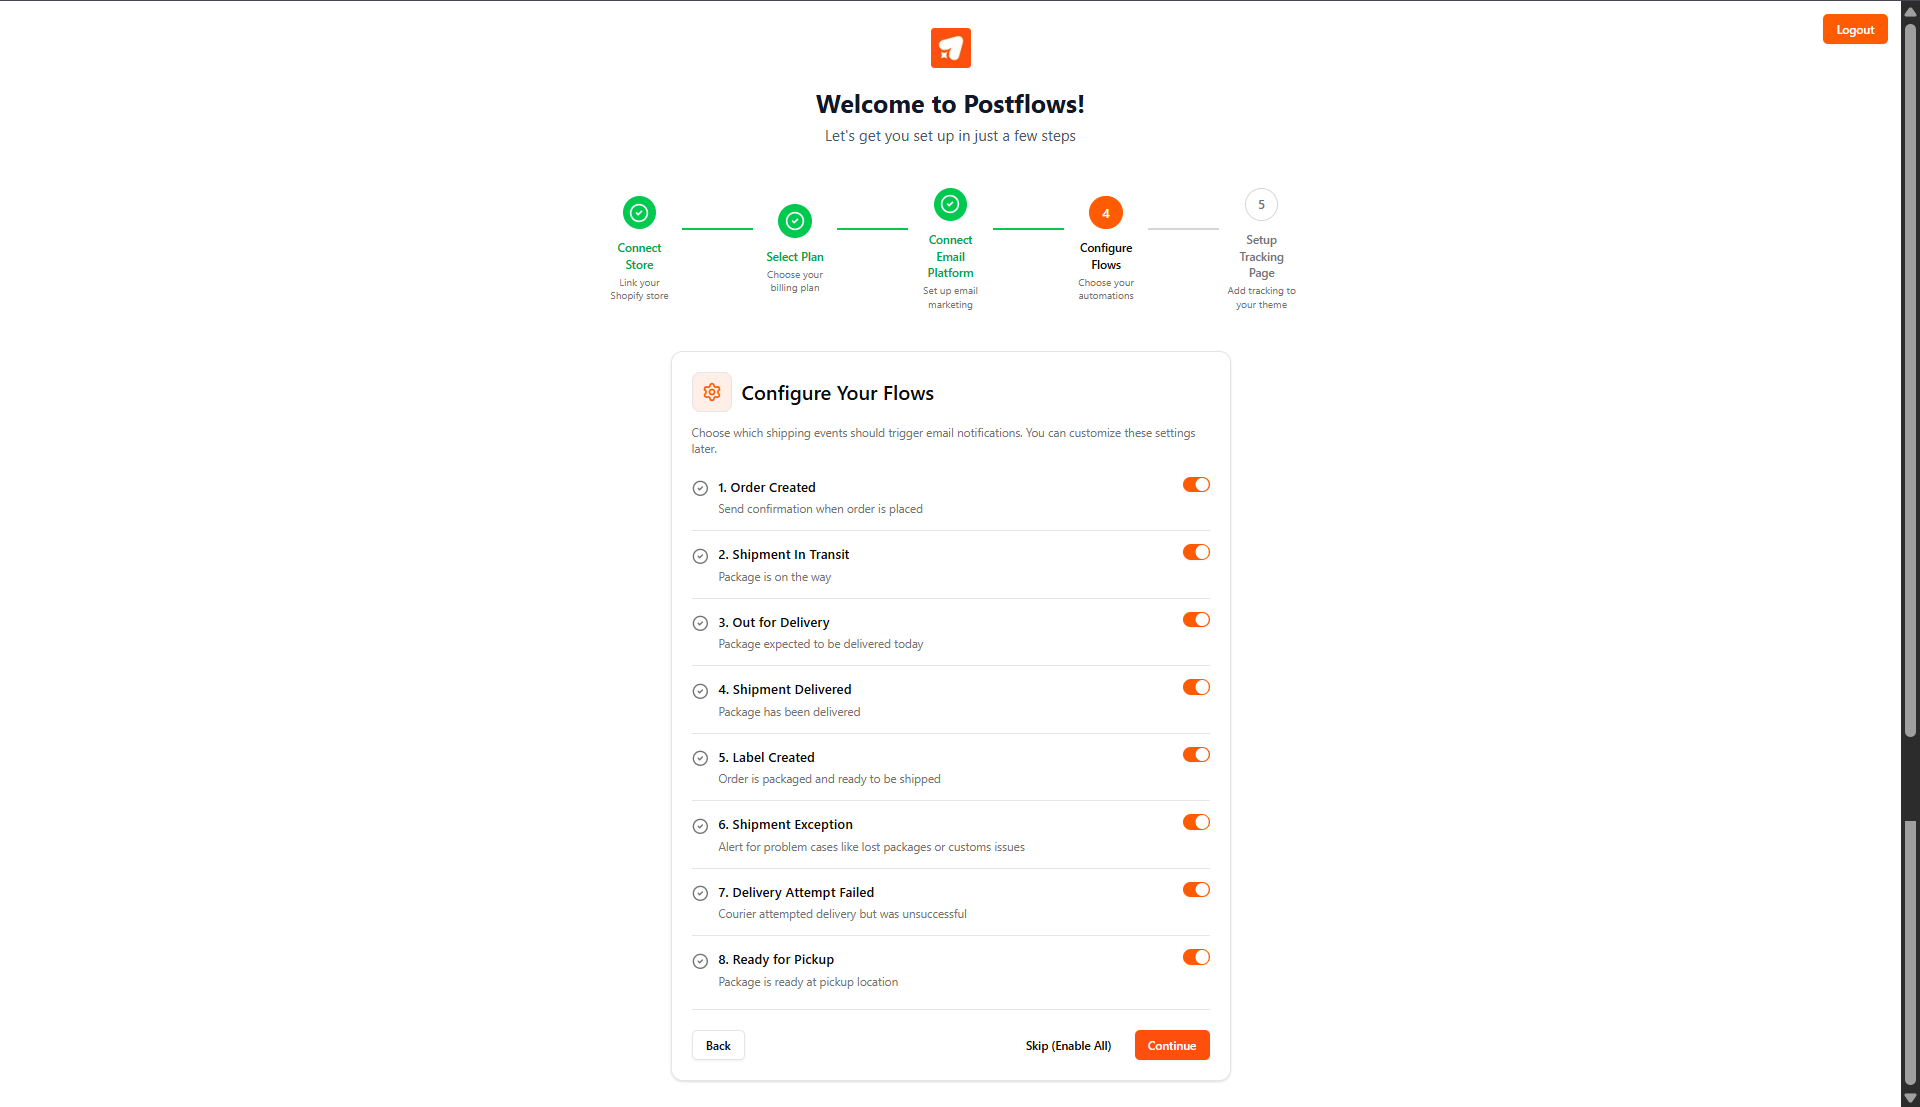
Recommended starting point: Enable Shipment In Transit, Out for Delivery, and Shipment Delivered. These cover the core post-purchase journey and have the highest impact on customer satisfaction.
For a full description of each event, see Available Events and What Triggers Each One.
Toggle on the events you want to activate
Click Continue
Tip: Not sure which to pick? Click Skip (Enable All) to turn everything on - you can fine-tune later from the dashboard.
Step 5 - Set up your Tracking Page (optional)
This step shows a video tutorial and instructions for adding a branded tracking page to your Shopify store. So customers can track their orders directly on your site without leaving it.
You can click Skip to complete setup without adding the tracking page now. It can be set up any time from Dashboard > Tracking.
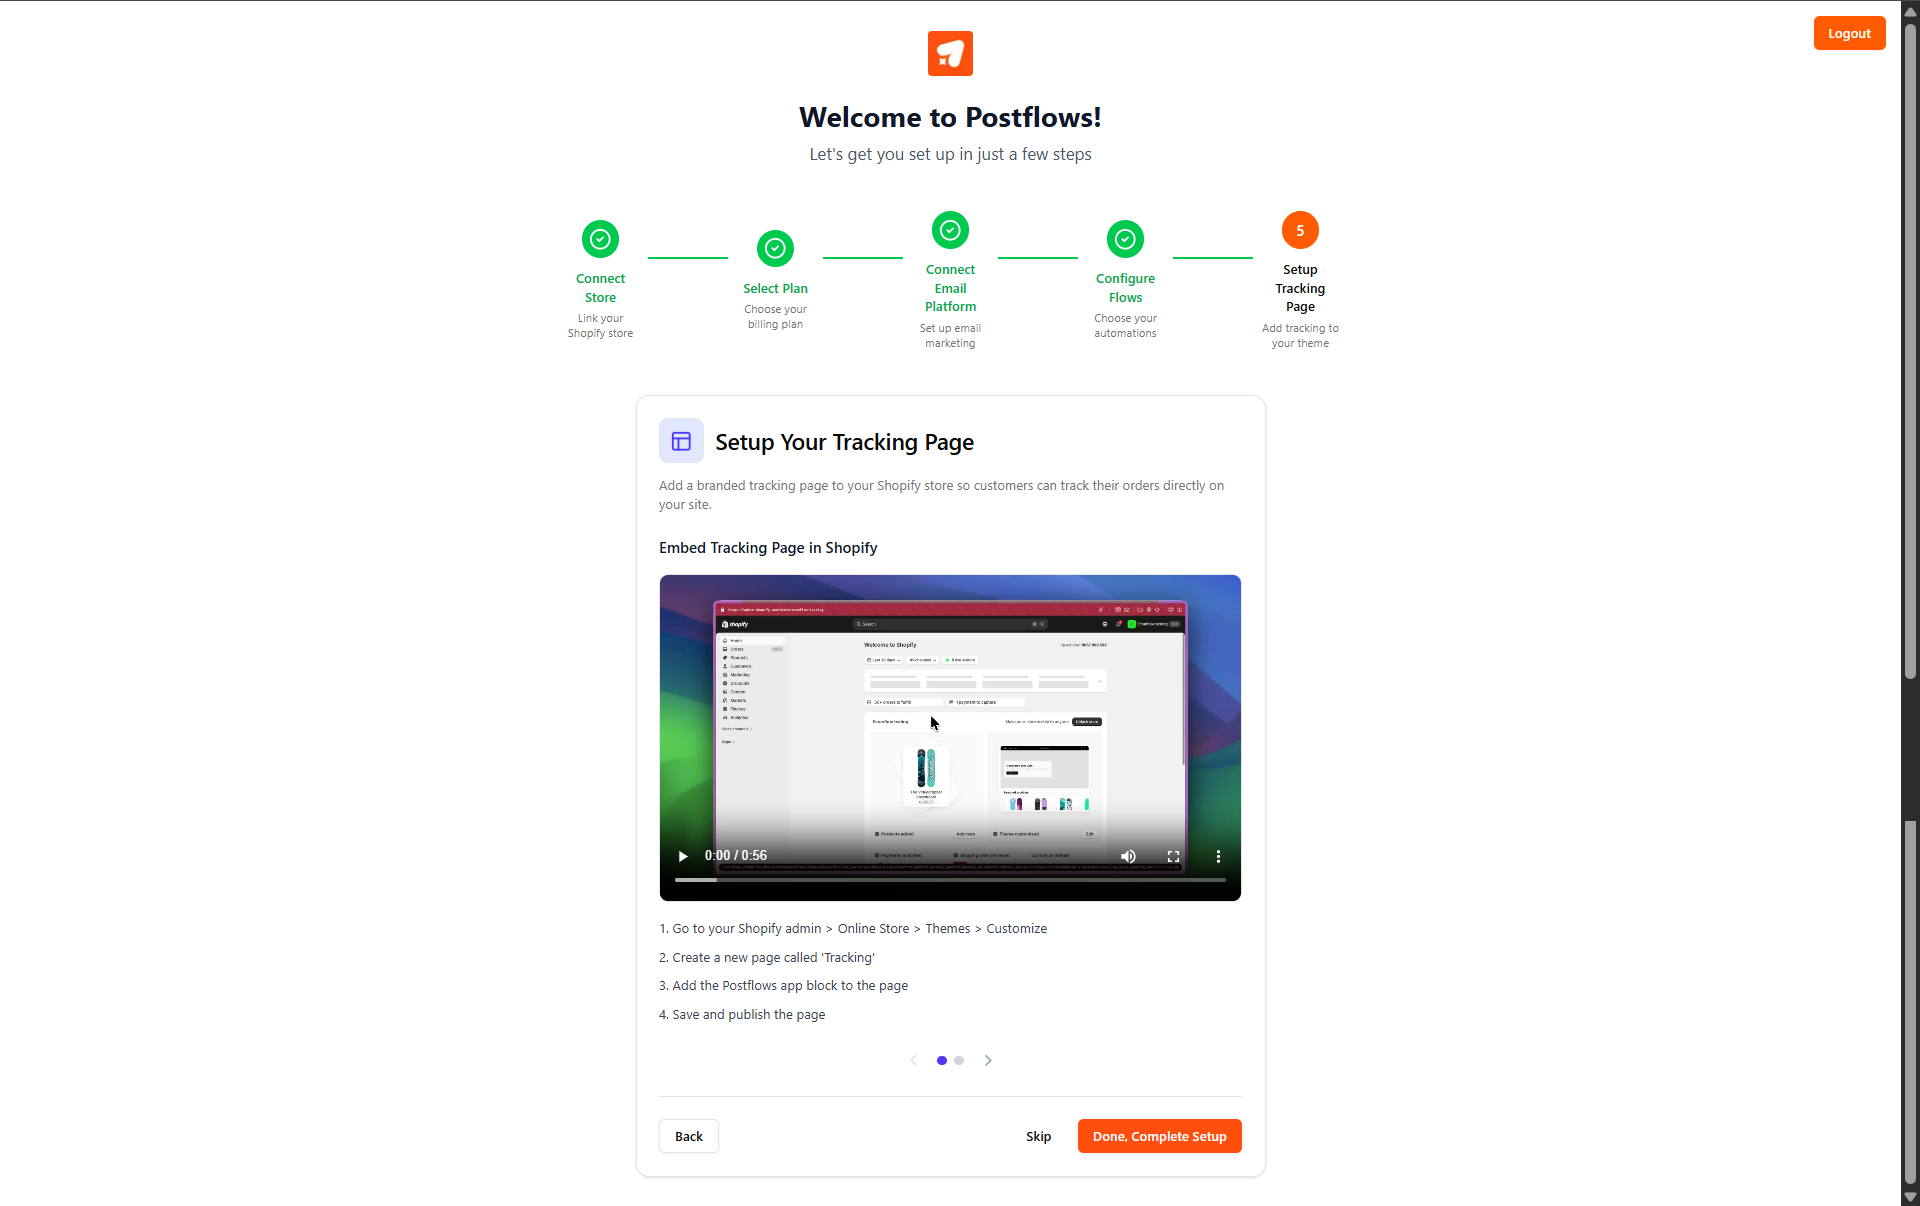
For full details and screenshots, see Embedding the Tracking Page in Your Shopify Store.
You're done
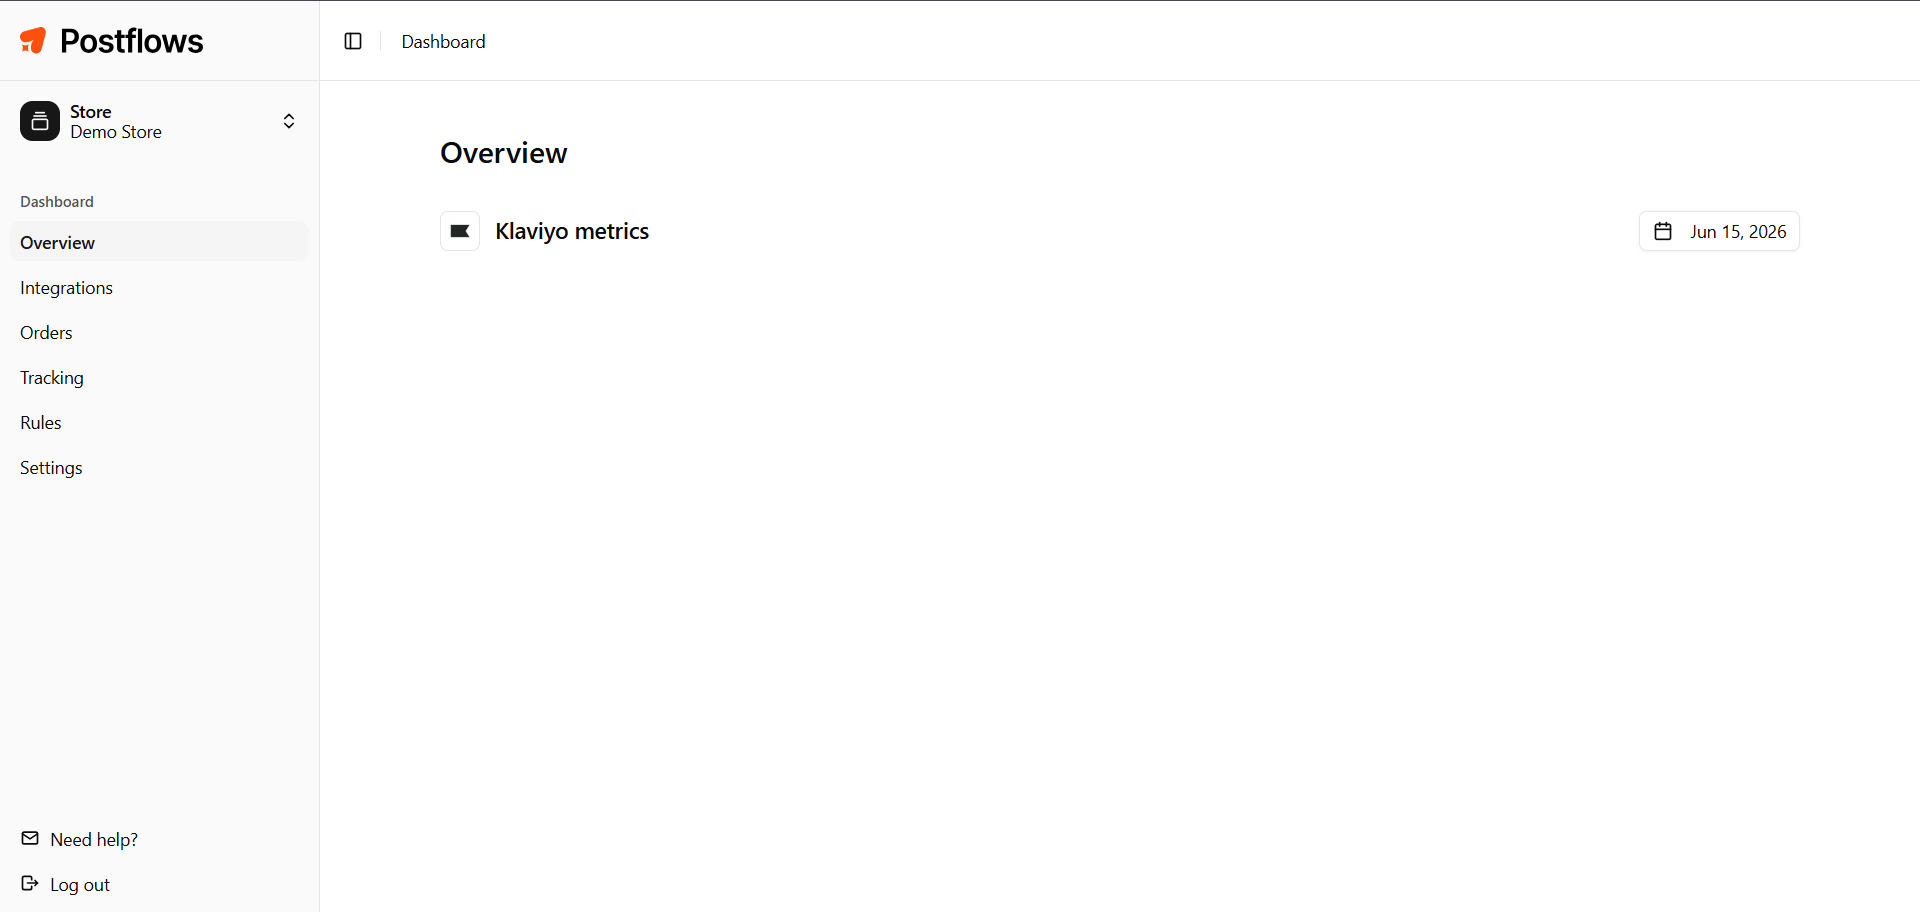
Postflows is now active. When a shipping event occurs for one of your orders, Postflows sends it to your email platform automatically.
What to do next
Check your dashboard - The overview shows all shipping events Postflows has processed
Set up rules - Use order filters and event filters to control which orders and events are processed
Customize your emails - Build or update your email templates in Klaviyo or Omnisend to match your brand
Need help?
See Where to get help if you run into any issues during setup.